It is always my goal as a hair stylist to simplify beauty. I like short cuts and keeping things as easy for clients as possible so they can recreate looks at home. I have tried a ton of products and I have countless tools at my disposal. Testing things out for my clients is one of the perks of the job (I mean have you seen the MiraCurl …that’s a thing)? No matter what they come out with I tend to come back to what I know and love and I absolutely love a basic (quality) curling iron. With just a few manipulations, you can get multiple looks with just one tool! All of the looks below were created using a 1 inch Hot Tools curling iron (yes it HAS to be Hot Tools) and if you aren’t sure which barrel you need, check out THIS post.
BIG VOLUME

 STEP ONE: Start with a voluminous blow out. The more volume you can create in the blow out the easier this will be and the less work you will have to do with your curling iron.
STEP TWO: Prep the hair using a hairspray (I like Living Proof Flex). Begin curling your hair on the curling iron like it’s on a roller (not in a spiral motion). Carefully remove the hair off the curling iron and re curl it like there is an invisible roller and pin in place (see pic on the left). Start with the center mohawk section and then do the sides.
STEP THREE: Allow the hair to sit as long as you can (the longer you wait the more volume). Carefully remove the pins from the bottom and tease each curl lightly as you take it out.
STEP FOUR: Using a boar bristle brush smooth out the top layers and allow the curls to fall where they want!
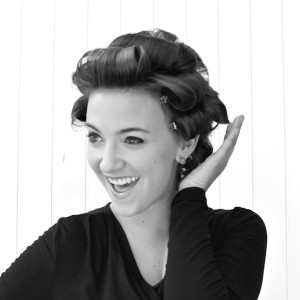
ROCK STAR TEXTURE
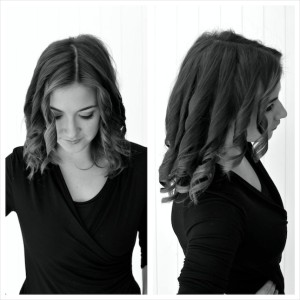
STEP ONE: Again, a great blow out to start. This time focus on adding texture. I like Living Proof Flex to give some grip.
STEP TWO: Taking large vertical sections (see photo) spiral curl the hair starting mid-strand and then feeding the hair through the iron so that the heat is evenly distributed. Curl the hair away from the face.
STEP THREE: Flip your head upside down and run your fingers through your hair to start to mess it up and give it that rock star look. Flip back over and focusing on the crown, take your curling iron and wrap small sections of hair around the wand (don’t worry about the clamp here) you are just touching up around the crown where it needs more texture.
STEP FOUR: To finish, use some paste to give it a piecey look. I like Living Proof Amp. It’s the perfect product to give it texture and keep it from looking too perfect.
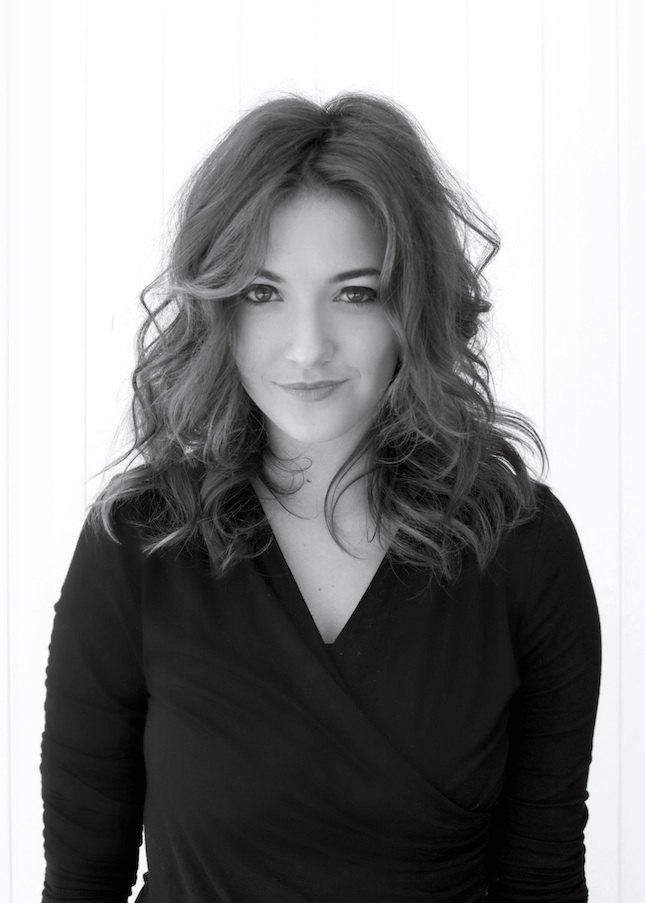
GLAMOUR

STEP ONE: Start with a clean deep part to the side. Then curl hair the same as the ROCKER example above.
STEP TWO: Instead of flipping over and shaking it out, you want to carefully brush out the curls with a boar bristle brush and smooth them out. If you have used enough heat and let them cool then brushing them shouldn’t take the curl away. If it does, it’s possible you are using the wrong size curling iron. As you are smoothing out the curls they should bounce back into place!
STEP THREE: Finish with a light serum (I like Living Proof Satin…careful it only takes a tiny amount). Smooth the opposite side from your part behind your ear and you can even secure that side with a bobby pin. Allow the other side to swoop down for a dramatic look!
Patricia McCoy
February 18, 2015 at 3:47 pm (11 years ago)I personally love my Karmin
emjoi epilator
March 24, 2014 at 3:56 pm (12 years ago)|These wet epilators were meant for thoroughly risk-free functioning in water. The smart aspect of this is that epilating in hot water is significantly less traumatic on account of the water comforting the skin and opening up your pores allowing for faster, less biting hair removal.
Rekha
February 4, 2014 at 7:17 pm (12 years ago)A really helpful post. These three looks are awesome and it urge me to try to bring the same look with my curling iron. Thanks.
homepage
December 24, 2013 at 2:02 am (12 years ago)Whаt’s up, I check your blog on a regular basis.
Your ѕtory-telling style is awesome, keep it up!
Rachel
December 18, 2013 at 4:19 am (12 years ago)The third look is my fave. She looks glamorous!
Jennifer
December 17, 2013 at 6:00 pm (12 years ago)So many looks so hard to choose. But in the end, I’m all about the rock star look!